
Login

Once the installation of your new server has been successfully completed, you will be able to access your application's administration interface from your domain name using the manager username and password provided in the email you received at the end of the installation (the password can be changed once you log in the first time).
The administration interface allows you to manage users, accounts, devices, application settings and many other features.
Change password
To change your password, do the following:
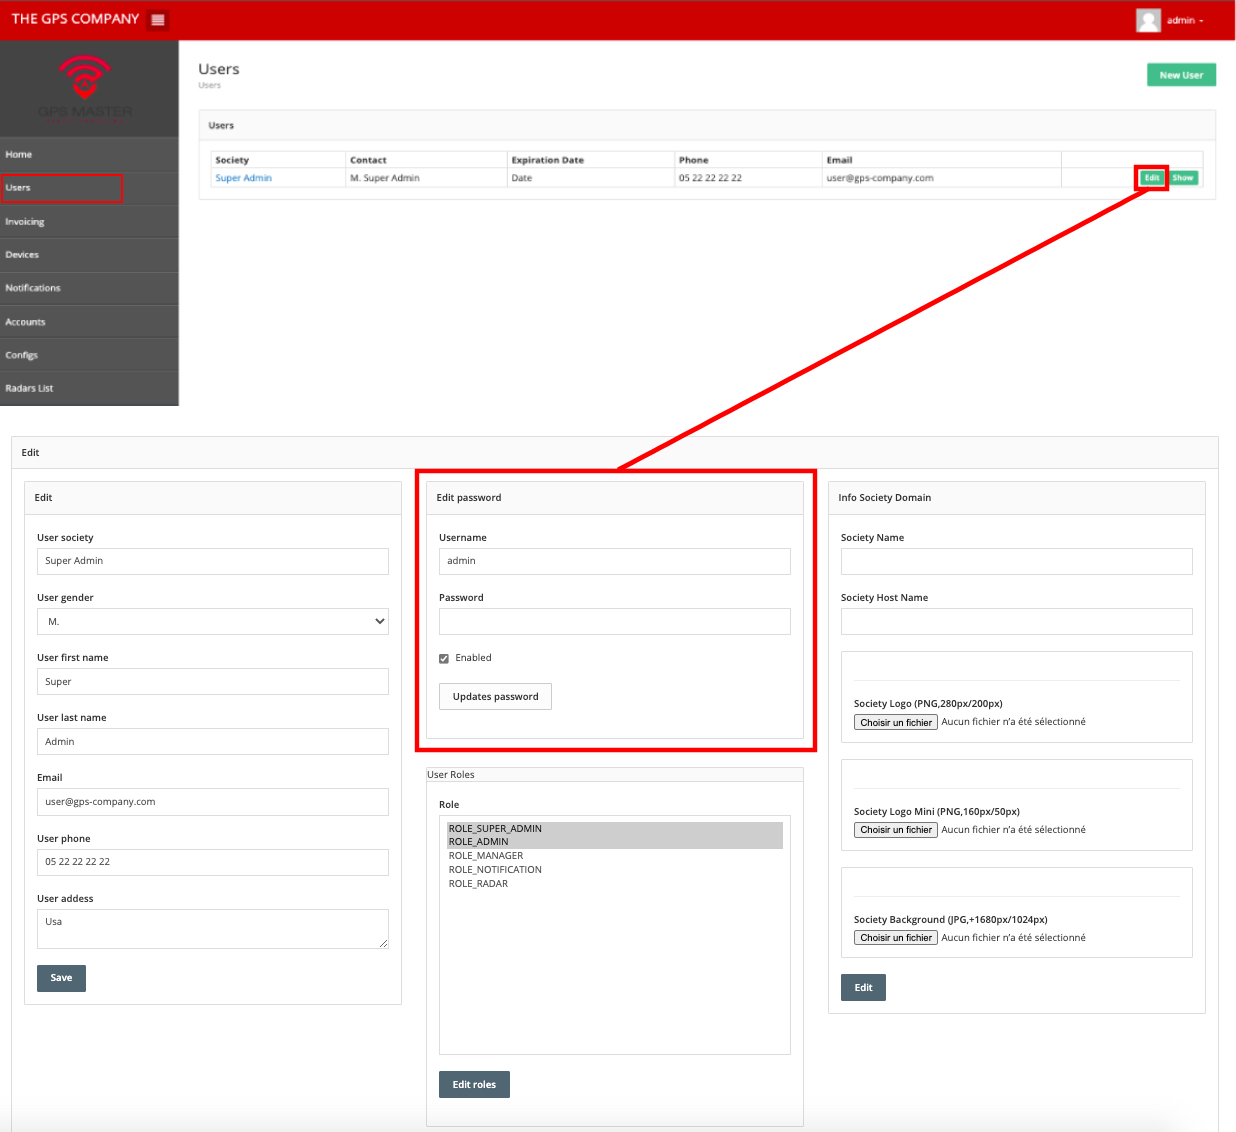
1. Select 'Users' from the left menu.
2. The user list page appears.
3. In the list page, choose the user you want to edit and click the "edit" button on the right side. (there is only one super admin user by default).
4. The user modification window appears.
5. Go to the 'Change Password' tab and enter a new password.
6. When you are finished, click on "Update Password" to save your latest changes.
Create a new account
To create a new account, do the following:
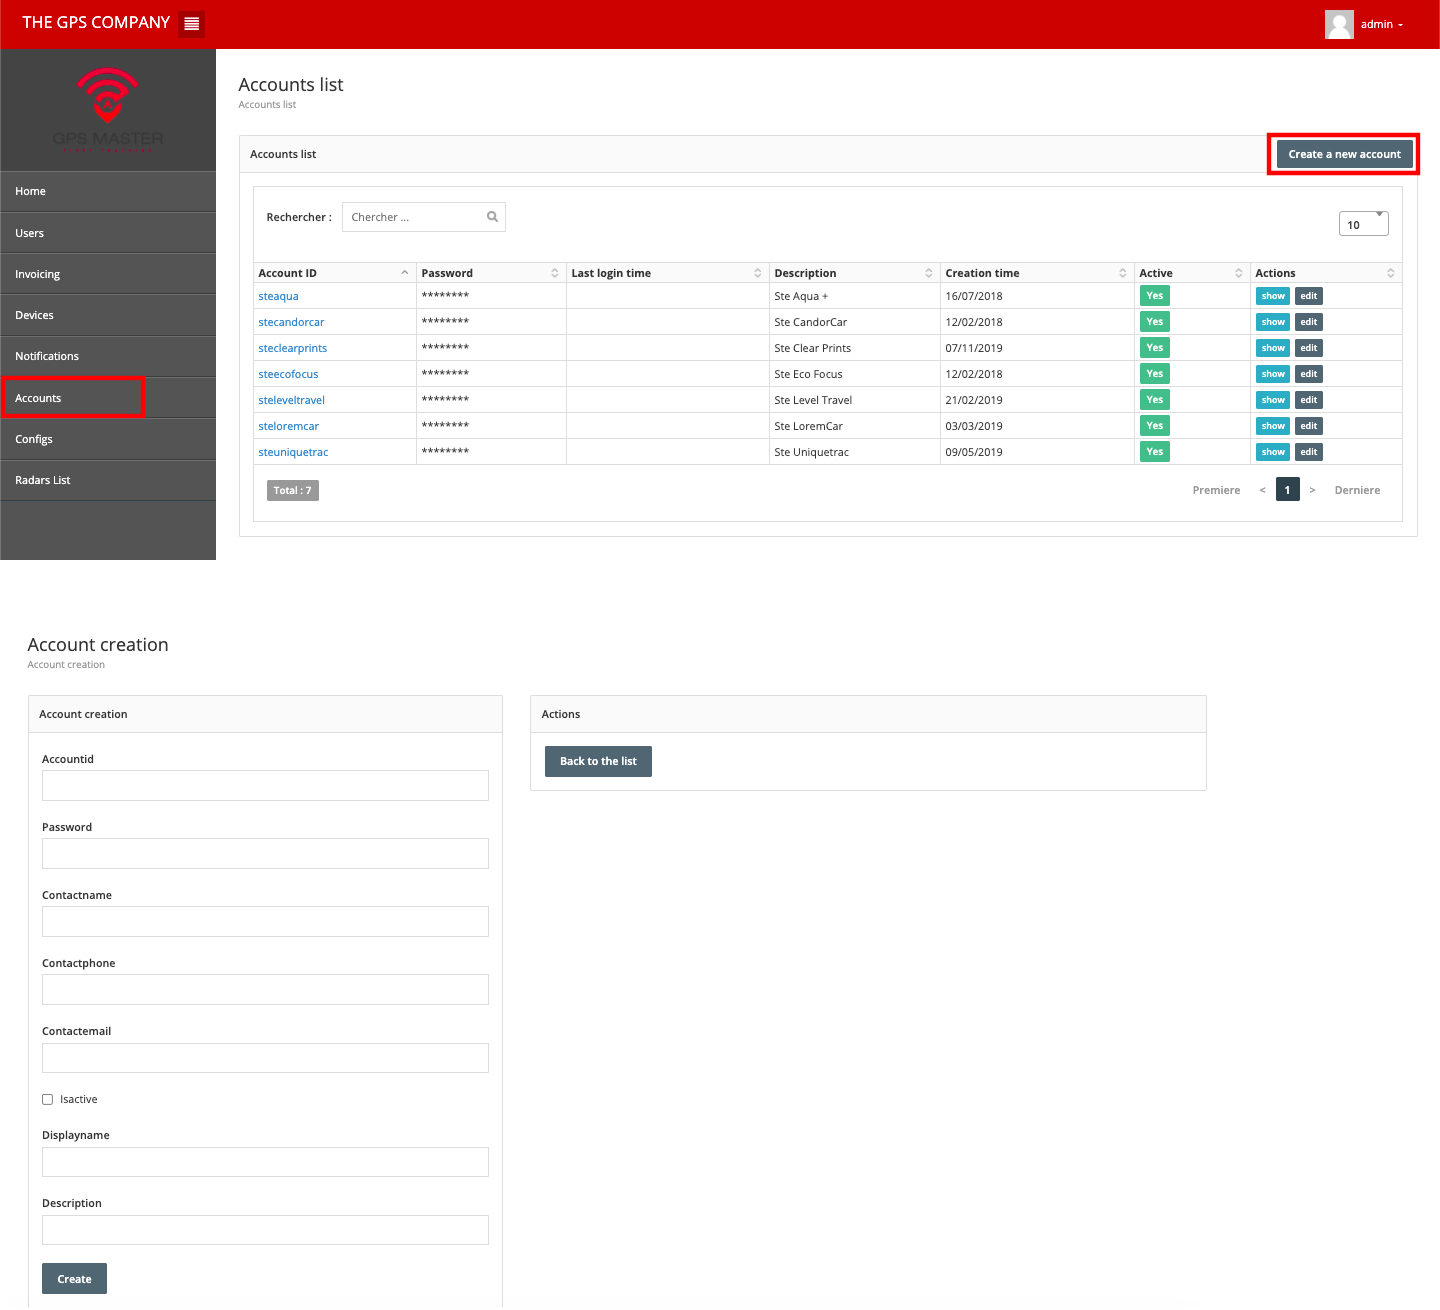
1. Select 'Accounts' from the left menu.
2. The list of accounts will appear, in the upper right corner of the list page, press the 'Create New Account' button.
3. The window for creating new accounts appears.
4. Enter the account information and password.
5. Press the "Create" button.
Edit an account
To edit an account, do the following:
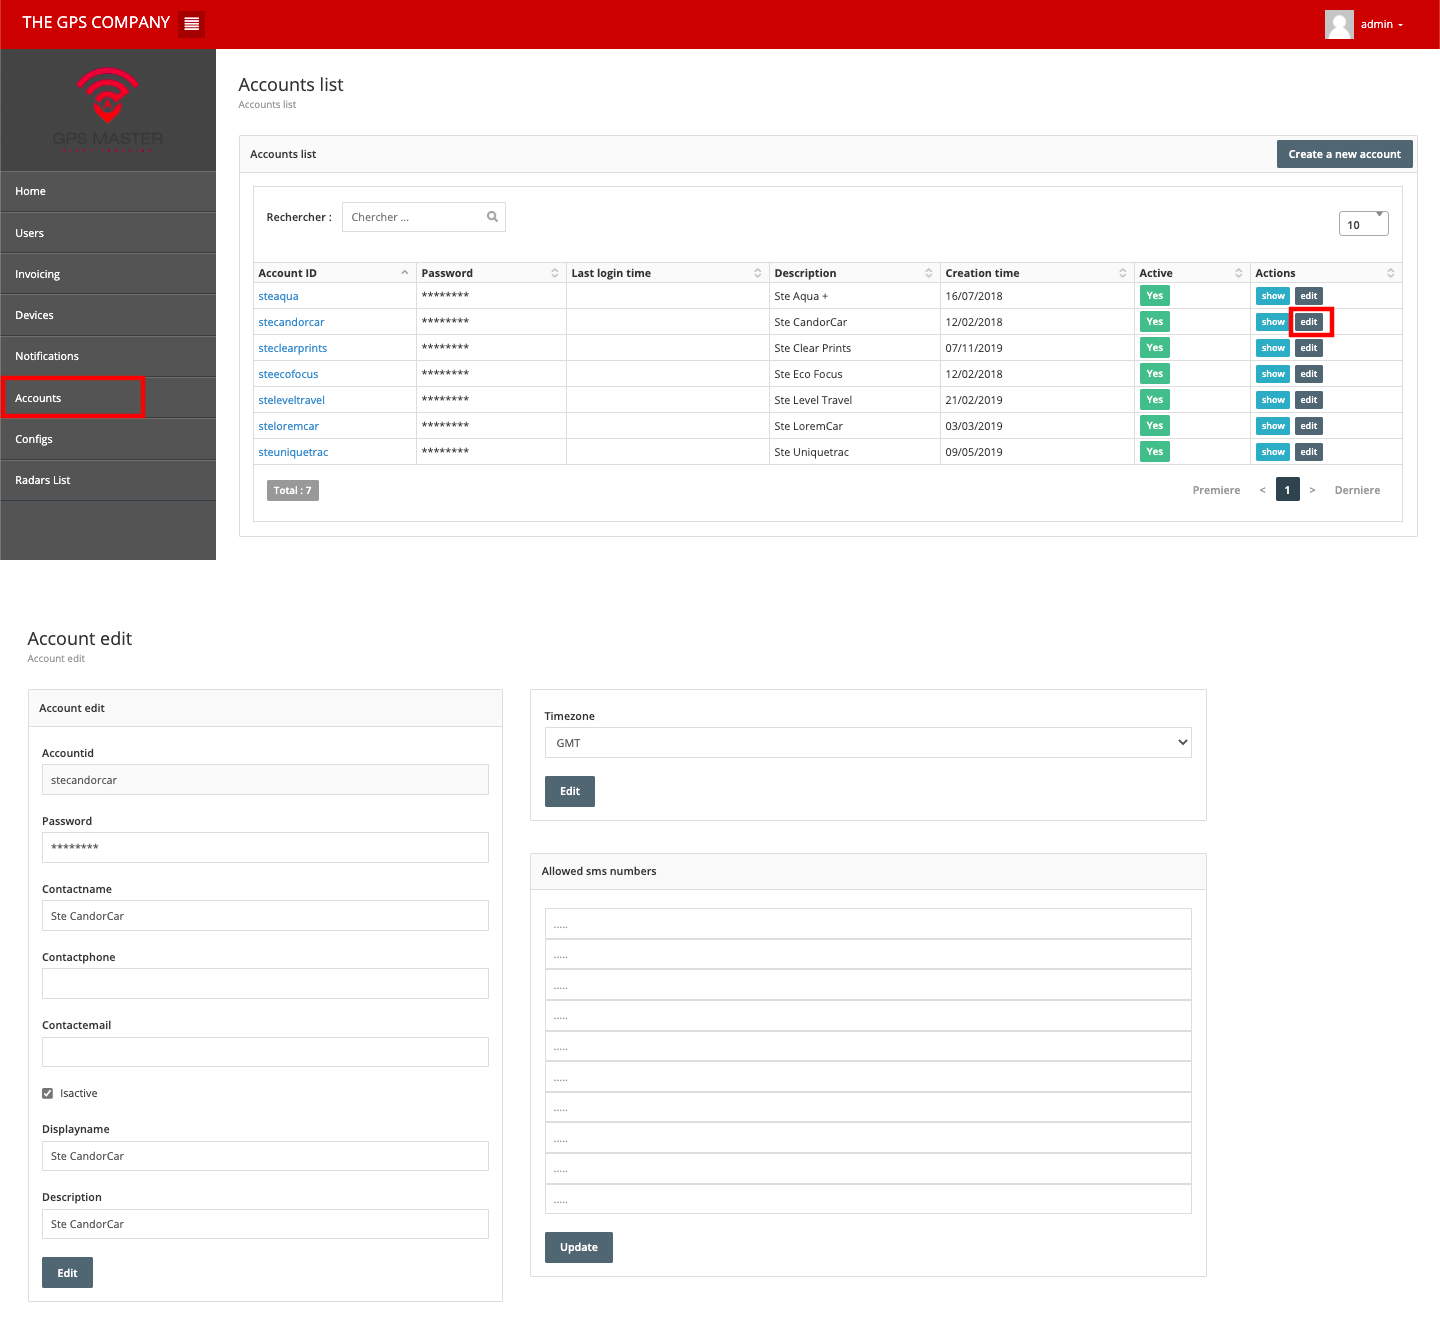
1. Select "Accounts" from the left-hand menu.
2. In the list page, choose the account you want to edit and click the "edit" button on the right side. The account modification window appears.
4. When you are done, click the "edit" button.
Delete an account
To delete an account, do the following:
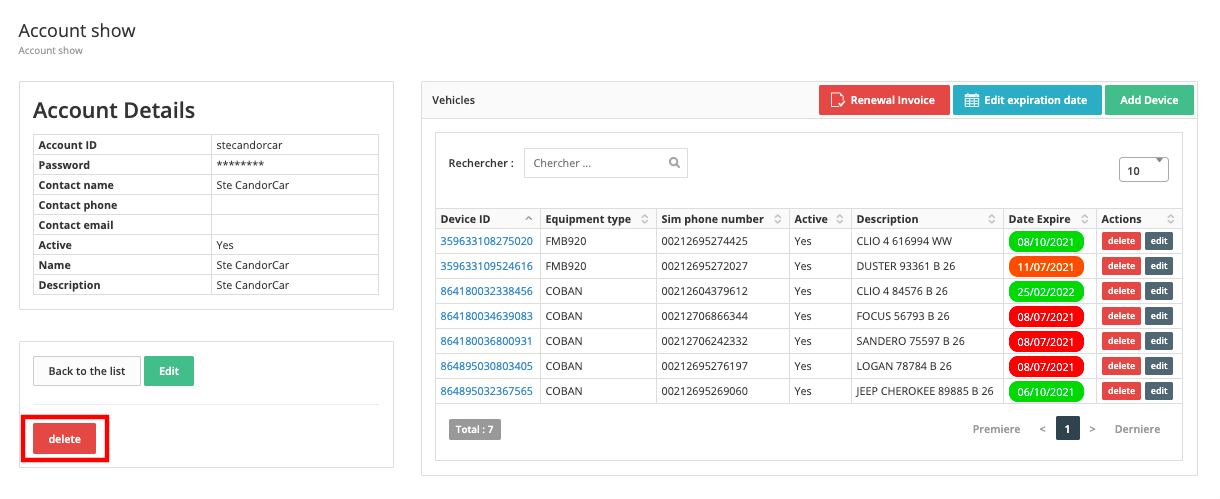
1. Select 'Accounts' from the left menu.
2. In the list page, choose the account you want to edit and click the 'View' button on the right side.
3. The account details window will appear.
4. In the lower left corner of the account details page, click the "Delete" button.
Add a new device
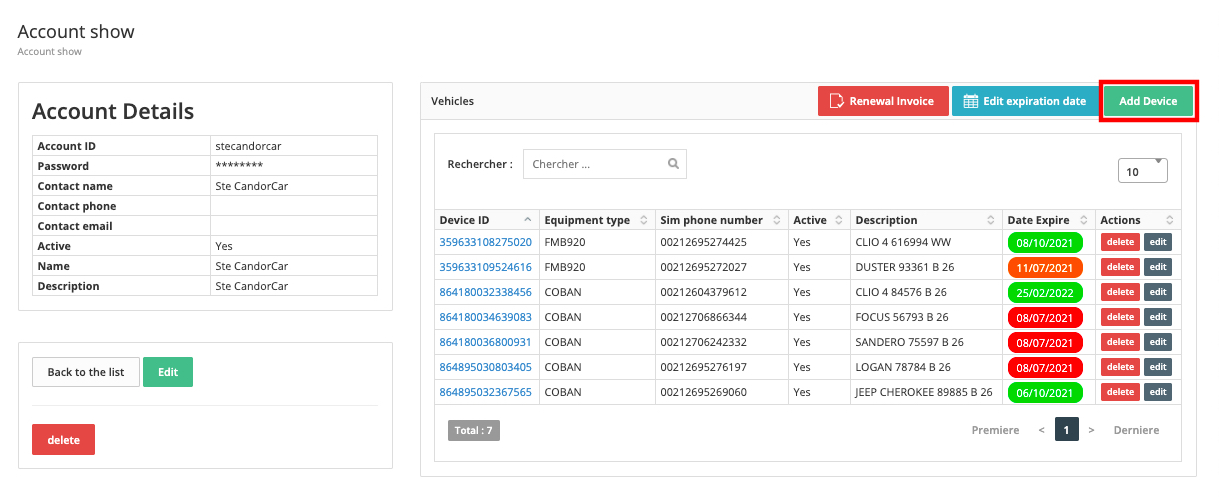
To add a new device, do the following:
1. On the account details page, on the right hand side, in the list of devices, on the top right hand side, press the "Add a device" button.
2. The "Add New Device" window will appear.
3. Enter the device information.
4. Press the "Create" button.
Modify a device
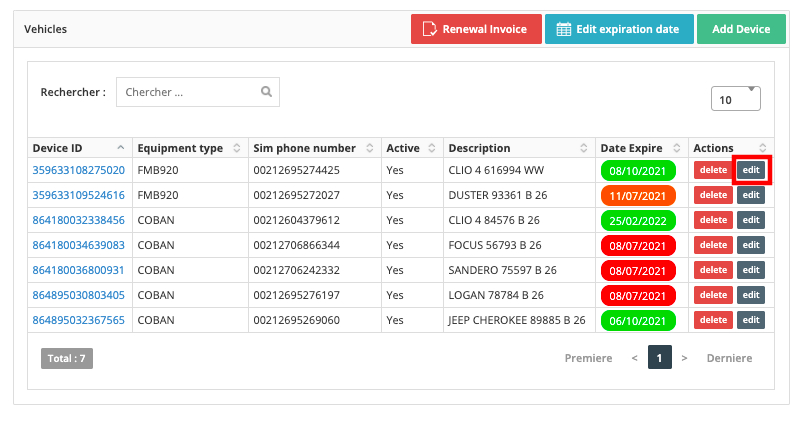
To modify a device, follow these steps:
1. On the account details page, on the right, in the list of devices, choose the device you want to modify and click the "modify" button on the right.
2. The edit device window will appear.
3. When finished, click the "edit" button to save the changes.
Delete a device

To delete a device, do the following:
1. On the account details page, on the right, in the list of devices, choose the device you want to delete and click the "delete" button on the right.
2. A confirmation window will appear.
3. Press "OK" to confirm your action.
Subscription renewal
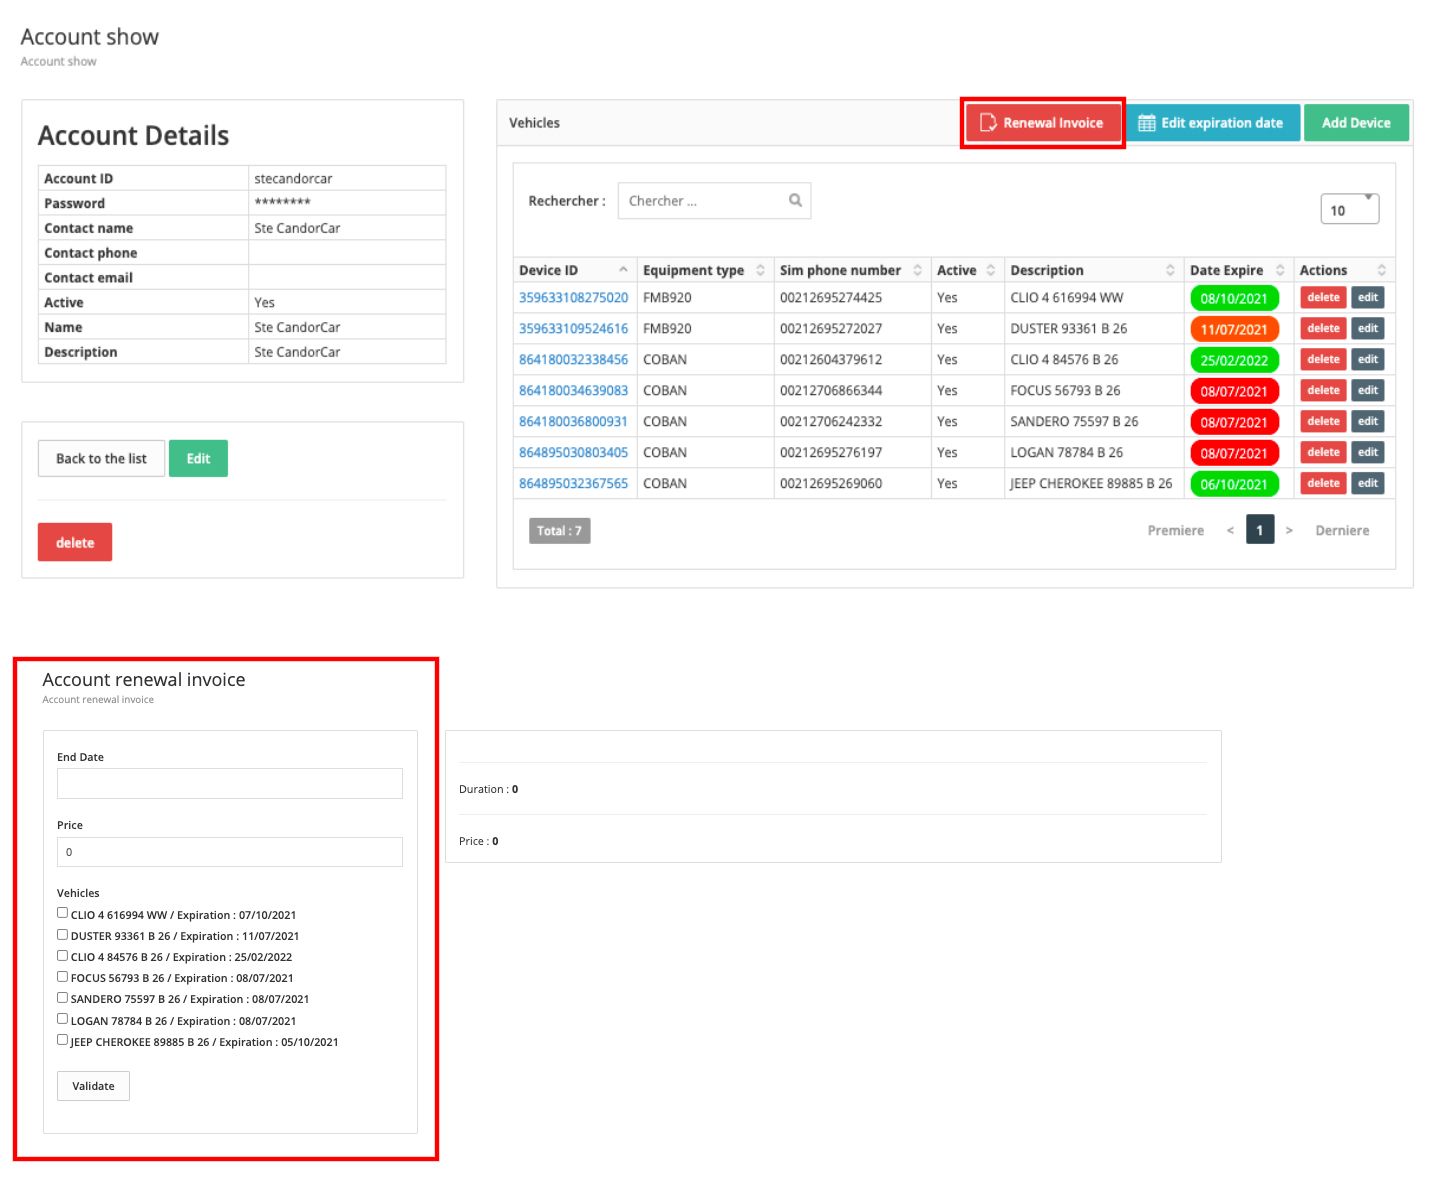
To renew subscriptions, do the following:
1. In the account details page, on the right hand side, in the device list, in the upper right corner, press the "Renew Bill" button.
2. The subscription renewal window will appear.
3. Enter the end date, the price, and check the vehicles to be renewed.
4. Press the 'Validate' button.
Change the expiration date
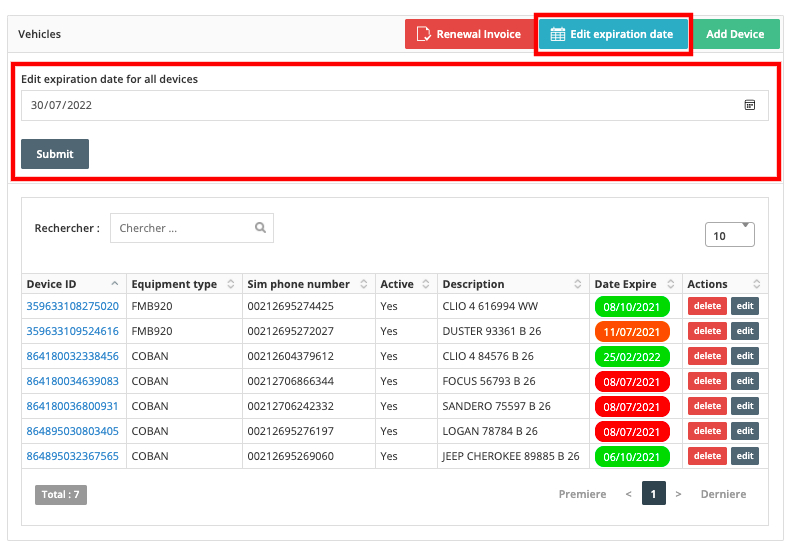
To change the expiration date of subscriptions, do the following:
1. On the account details page, in the upper right corner of the device list, press the "change expiration date" button.
2. A new tab will appear.
3. Enter the new expiration date for all devices.
4. Press the "Save" button.
Notifications
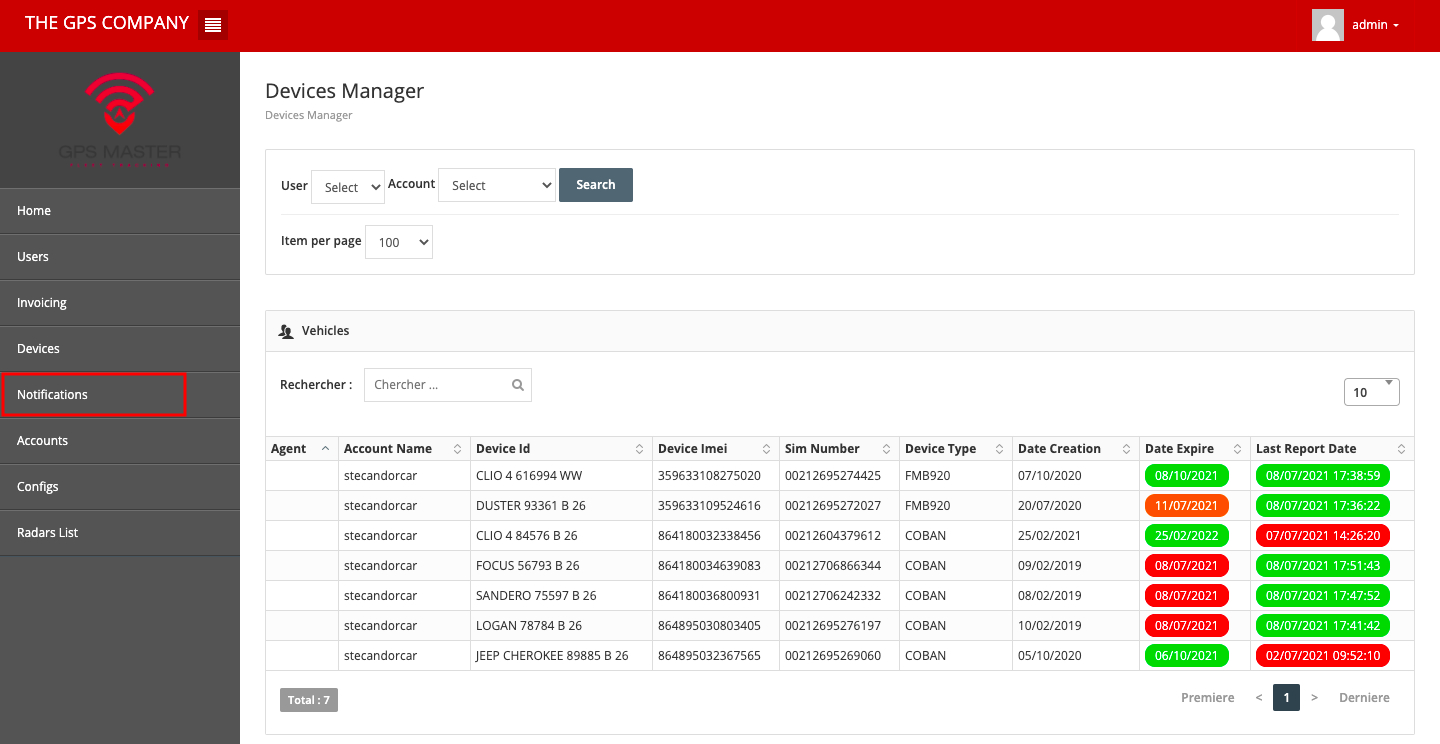
Remind the user of expiring devices.
To view the notification, do the following:
1. Select 'Notifications' from the menu on the left.
2. The notification list page appears.
Application settings
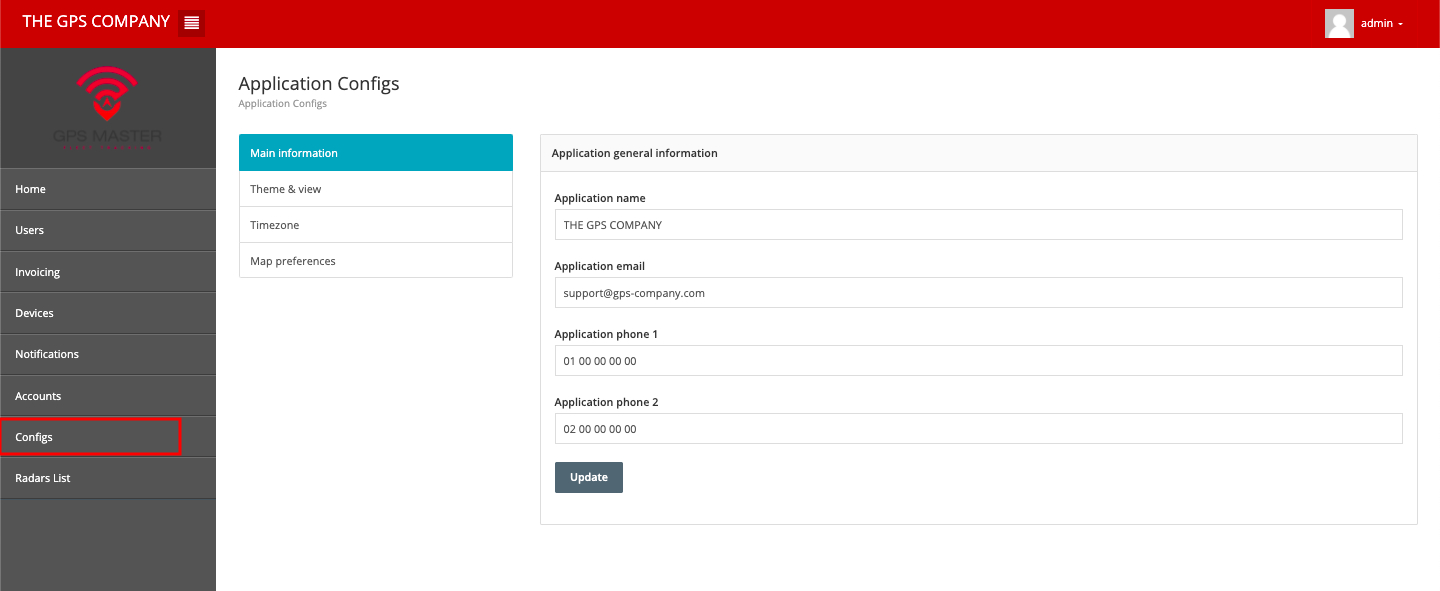
To change the application information, do the following:
1. Select 'Config' from the left menu.
2. The page for editing the general information of the application will appear.
3. Enter the new application name, email and phone number.
4. Press the 'Update' button.
Application customization
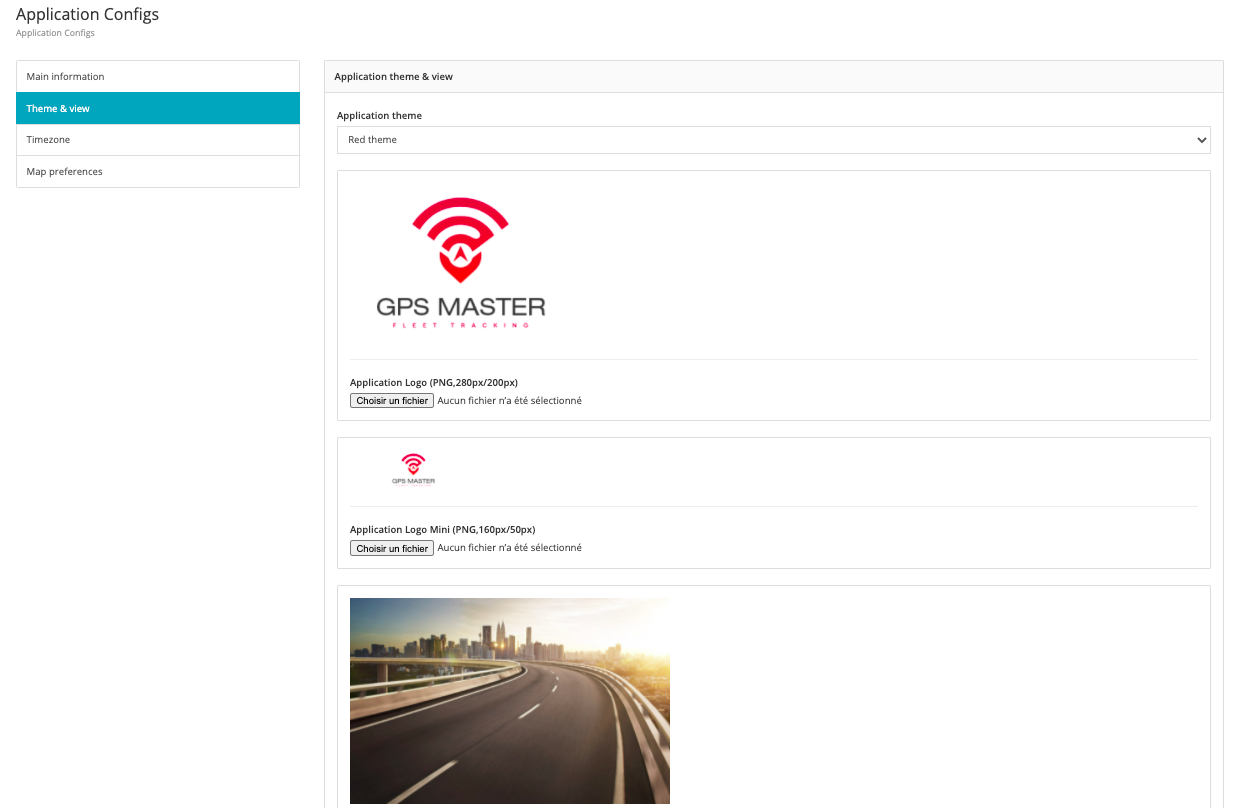
For further customization of your application, proceed as follows:
1. In the application configuration page, click on "Theme and Display" in the left sidebar.
2. The "Application theme & view" page appears.
This window will allow you to change the color of the application theme, the logo and the background of the login page.
3. When you have finished customizing, click on the "Update" button.
Timezone
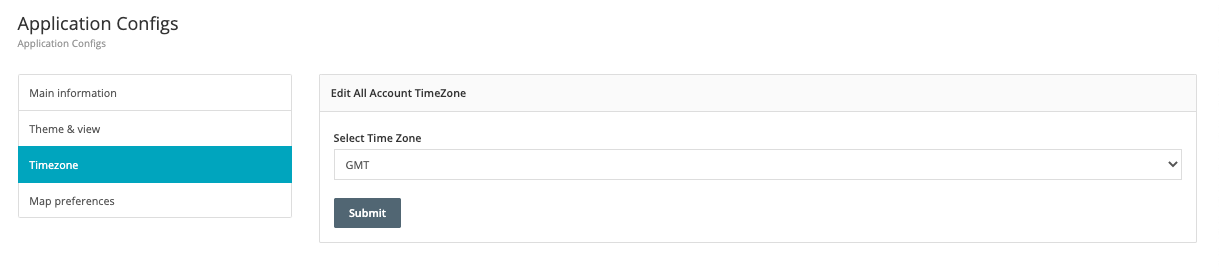
To change your time zone, do the following:
1. In the "application configuration page", click on "Time Zone" in the left bar.
2. The page for changing the time zone appears.
3. Press the "Update" button to save the changes.
Maps
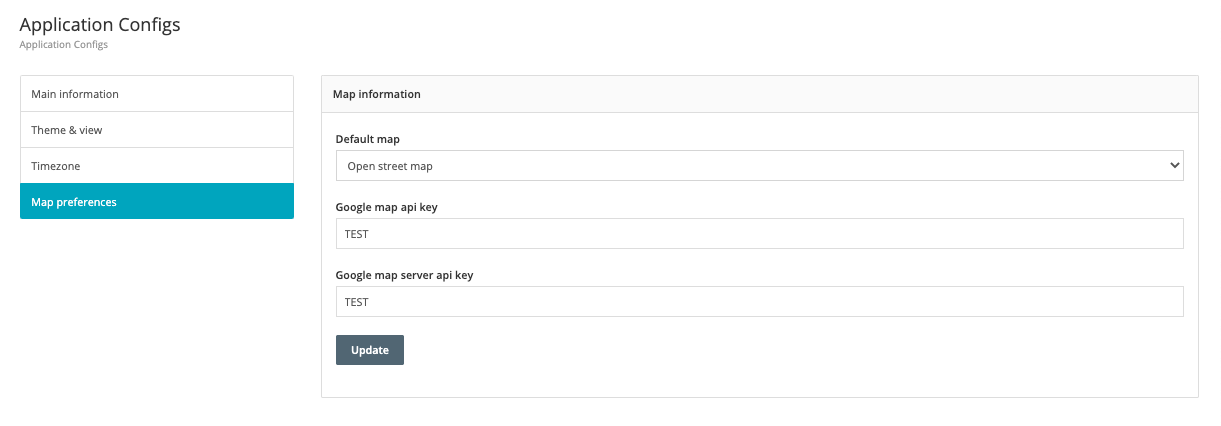
To choose your front-end card, proceed as follows:
1. In the application's configuration page, click on "Map Preferences" in the left sidebar.
2. The "Edit Maps" information page appears.
3. Press the "Edit" button to save the changes.
If you want to use Google Maps as your default map, you must provide the Google Map api key.
Visit the link and follow the steps to get your api key:
https://developers.google.com/maps/documentation/maps-static/get-api-key
List of devices
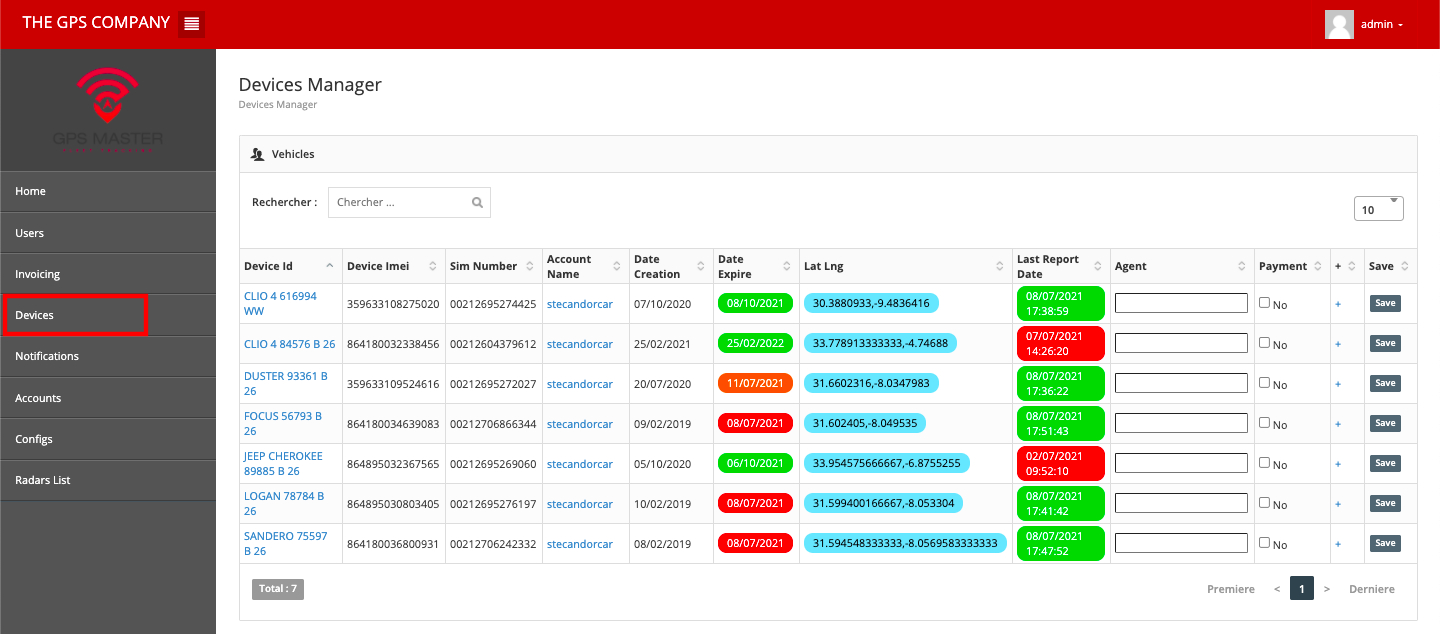
To view all devices, do the following:
1. Select 'Device' from the left menu
2. The list of devices is displayed.
- Device Id - Name of the device.
- Device IMEI - Device IMEI number.
- Sim Number - SIM number of the device.
- Account Name - Account name of the device.
- Creation Date - Date of creation of the device.
- Expiration date - Expiration date of the device.
- Lat Long - Longitude and latitude of the device (click on it to display the location of the device on Google Maps).
- Last Report Date - Date of the last report of the device.
- Agent - the name of the agent who installed the GPS (can be changed, click the "Save" button in the right corner to save the change).
- Payment - status of the device subscription (change the payment status by checking/unchecking the box and click the "Save" button in the right corner to save the change).
Click on the "+" button to view more details about the selected device.